February 21, 2018
How to Cook a Perfect Hardboiled Egg. And Peel it too!
My long-time roommate only has one dish in his food-for-guests repertoire. No matter what the occasion, if he’s tasked with bringing a dish, you already know what he’ll be making: deviled eggs. While there are tons of modern and fancy takes on the classic appetizer, he prefers the simplest recipe around: eggs, mayo, mustard, salt, pepper, and a garnish of paprika. That’s it. Simple, but oh so delicious. A large plate of these is guaranteed to be cleaned even before all the guests arrive.
Having watched him make these beauties tens of times, I can tell you it’s quite the spectacle. He adds mayo and mustard literally one drop at a time toward the end, tasting after each addition to see if he has the mix just right. All the while mumbling to himself, sure that he’s ruined this batch beyond repair. This process is so consistent, it has become a joke around the house. They always turn out perfect, but you would never know that if you just listened in on the process without getting to taste the fruit of all that anxiety. He also recently discovered the Pastry Bag, which makes for a beautiful display!
But the mixing isn’t even the most stressful part for him. He has such a hard time with the peeling of fresh eggs that he won’t even do it anymore. He’s outsourced that project to his girlfriend. After mangling hundreds of eggs trying to remove the shell from those farm fresh eggs, he would rather not even touch them until they’re peeled and ready to go.
Luckily for him–and for you, reader–I’ve discovered the method for not only perfectly cooking hardboiled eggs, but also for coaxing them out of their shells unscathed. This works with even the freshest eggs. I have seen so many articles with suggestions on how to make peeling easier. I even saw one that “scientifically” tested five or six different methods. I’ve tried them all. They don’t work. Turns out, the solution is elegantly simple.
First, the Cook
You don’t need to add anything to the water except for a little salt. Baking soda won’t help with the peeling and for some people, it leaves a bitter taste. Bring water to boil on high in a straight-sided pan. You can add the water with the eggs in there so you’ll know how much you need to cover the eggs, but boil the water without the eggs.
Once boiling, turn the heat down to medium (you still want it to boil, just not so violently) and slowly ease the eggs into the pan; you can use a slotted spoon for this if proximity to scalding water is frightening for you… or you’re known for burning yourself. Set a timer (I use my phone) for 9 minutes. Depending on your elevation and some other factors, this timing may need a slight adjustment. Also, the quantity and volume of eggs can make a difference. If you put a few cold eggs into water, it’s going to lower the temperature. If you put a dozen cold eggs in the same pot of boiling water, it’s going to lower the temperature even more. Start out with 9 minutes and six eggs and see how they turn out.
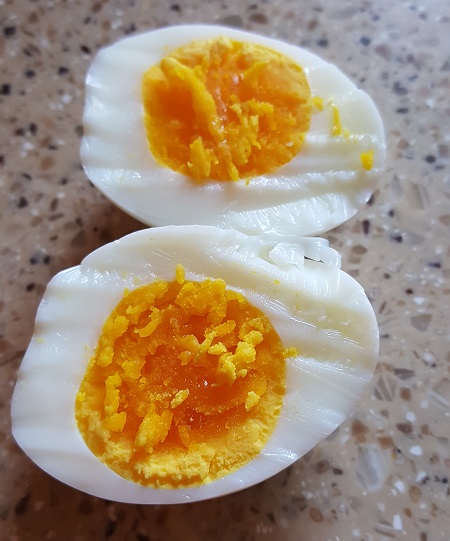
9 minutes will give you that bright yolk as shown above - with just a touch of translucence left in the very center of it. Cooking for longer can cause that nasty looking gray layer around the outside of the yolk to appear.
Finally, How to Make Peeling a Breeze
While the water is boiling, prepare an ice bath. I like to just fill a large mixing bowl with ice, leaving a little room at the top for the eggs. You can put water in there now, or after dropping in the eggs.
When the timer expires, turn off the heat and strain out the hot water into your sink.
Carefully move the eggs to the ice bath. You can add a bit of cold water to make sure that all of the eggs are completely submerged. Let them sit for five minutes or so. Pick up an egg. You should not feel any residual heat. Time to peel your eggs.
Do the following part immediately: crack the egg on the counter gently as you rotate it. I usually crack it all the way around a few times, passing through the north and south poles of the egg on each orbit.
Once you are able to get that first shell shard off of the egg, you’ll be able to get under the thin skin between the shell and the actual white of the egg. As long as you’re in that zone and the eggs haven’t been sitting out after cooking, the shell will come off with ease.
That’s it! Share your experience below. I would love to hear if anyone is getting a different result from following the same process.